静默安装Oracle11g流程
1. 服务器配置
2. Oracle文件
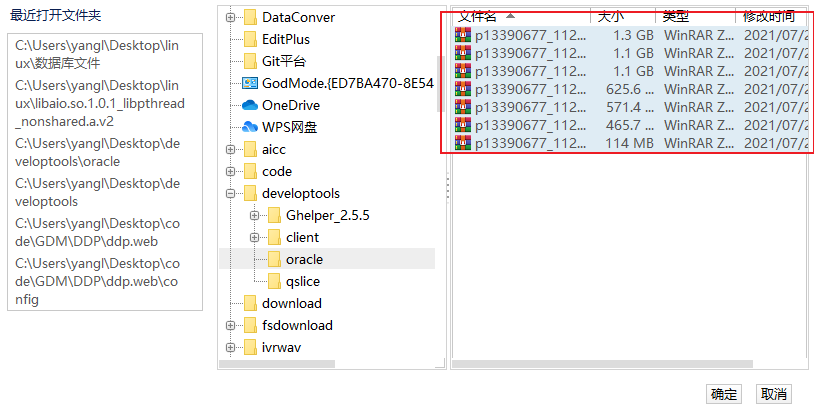
上传文件
因为oracle安装文件比较大,先提前上传到服务器上,后续再转移到指定文件夹下。或者创建好oracle用户文件夹后再上传
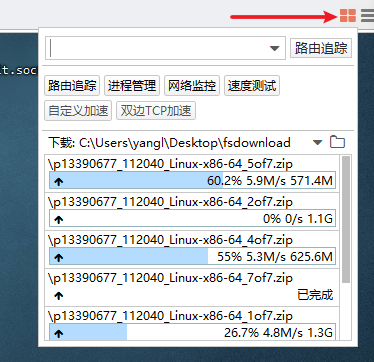
查看安装进度
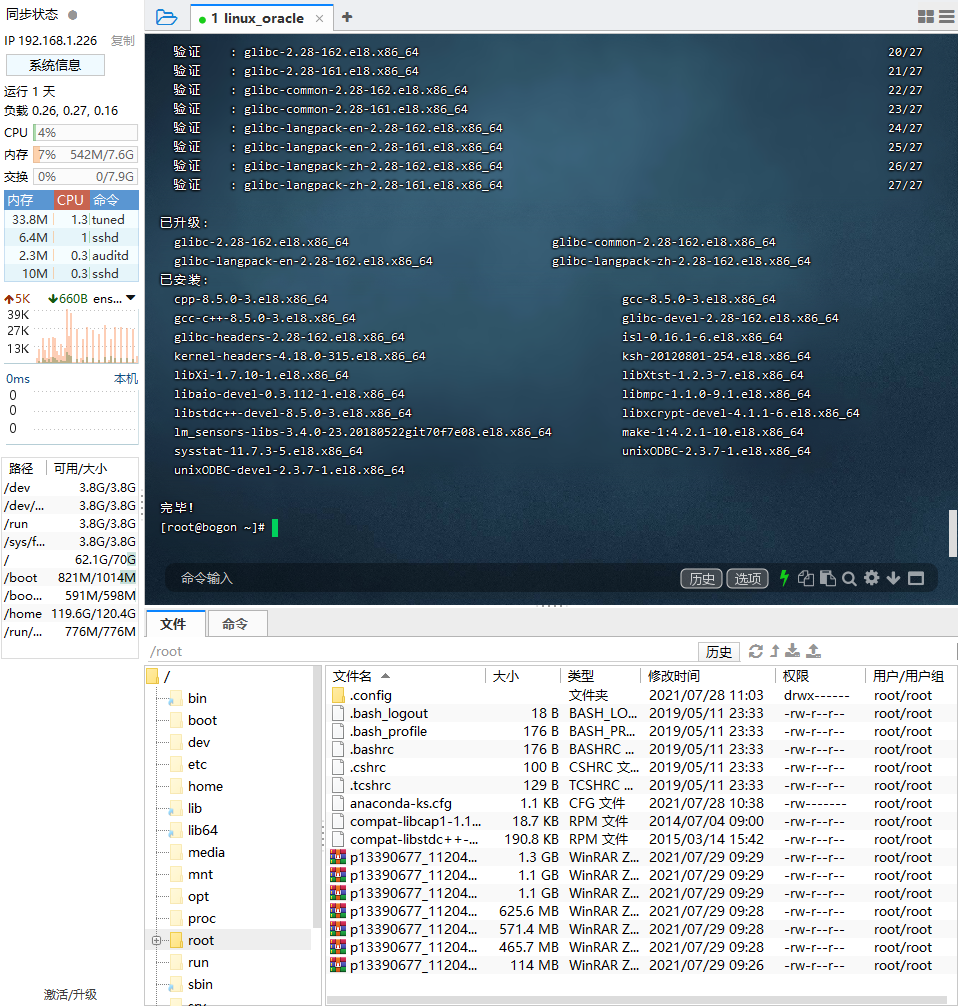
上传后如下图所示

3. 安装前准备
https://docs.oracle.com/cd/E11882_01/install.112/e47689/toc.htm
关闭防火墙
systemctl stop firewalld && systemctl disable firewalld
关闭SElinux
setenforce 0 && sed -i 's/enforcing/disabled/' /etc/selinux/config
3.1 安装依赖环境
https://docs.oracle.com/cd/E11882_01/install.112/e47689/pre_install.htm#BABCFJFG
yum install -y wget unzip net-tools vim lrzsz psmisc bash-completion \
&& source /usr/share/bash-completion/bash_completion
yum install -y \
binutils \
compat-libcap1 \
compat-libstdc++-33 \
gcc \
gcc-c++ \
glibc \
glibc-devel \
ksh \
libaio \
libaio-devel \
libgcc \
libstdc++ \
libstdc++-devel \
libXi \
libXtst \
make \
sysstat \
unixODBC \
unixODBC-devel
注:对于oracle11g 的安装, libaio1库版本不能大于0.3.109,查看解决办法
3.1.1发现错误
错误:没有任何匹配: compat-libcap1 compat-libstdc++-33
解决方法:下载rpm包 并安装
wget http://mirror.centos.org/centos/7/os/x86_64/Packages/compat-libcap1-1.10-7.el7.x86_64.rpm
wget http://mirror.centos.org/centos/7/os/x86_64/Packages/compat-libstdc++-33-3.2.3-72.el7.x86_64.rpm
rpm -Uvh compat-libcap1-1.10-7.el7.x86_64.rpm
rpm -Uvh compat-libstdc++-33-3.2.3-72.el7.x86_64.rpm
注. 因为网络原因,可能下载不成功,多尝试几次 ↩
安装后,重新执行命令
3.2 设置主机名
https://docs.oracle.com/cd/E11882_01/install.112/e47689/pre_install.htm#LADBI1152
hostnamectl set-hostname oracle11g \
&& echo "127.0.0.1   oracle11g" >>/etc/hosts
3.3 创建组和用户
https://docs.oracle.com/cd/E11882_01/install.112/e47689/pre_install.htm#LADBI1161
groupadd -g 501 oinstall \
&& groupadd -g 502 dba \
&& groupadd -g 503 oper \
&& groupadd -g 506 asmdba \
&& useradd -u 502 -g oinstall -G dba,asmdba,oper oracle \
&& echo 'oracle' | passwd oracle --stdin
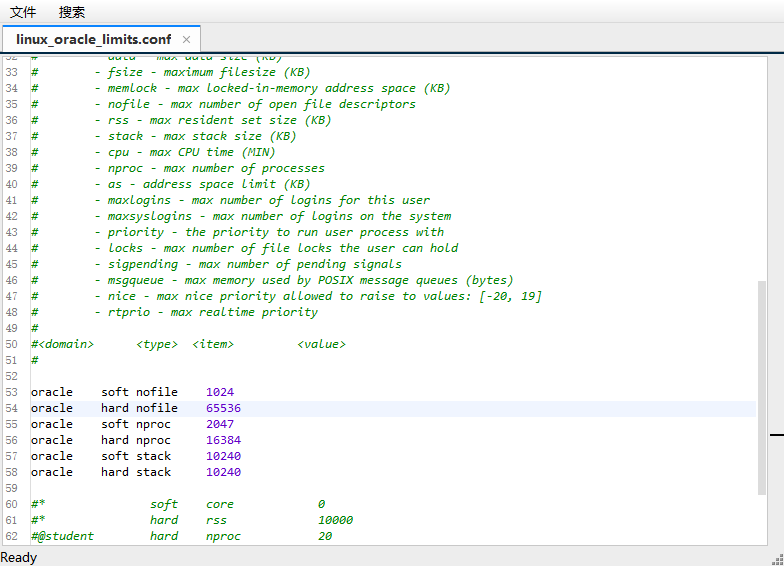
3.4 配置oracle用户资源限制
https://docs.oracle.com/cd/E11882_01/install.112/e47689/pre_install.htm#LADBI1180
编辑 /etc/security/limits.conf 追加以下内容
oracle    soft    nofile    1024
oracle    hard    nofile    65536
oracle    soft    nproc    2047
oracle    hard    nproc    16384
oracle    soft    stack    10240
oracle    hard    stack    10240
3.5 配置Linux内核参数
https://docs.oracle.com/cd/E11882_01/install.112/e47689/pre_install.htm#LADBI1188
编辑 /etc/sysctl.conf 追加以下内容
fs.aio-max-nr = 1048576
fs.file-max = 6815744
kernel.shmall = 2097152
kernel.shmmax = 4294967295
kernel.shmmni = 4096
kernel.sem = 250 32000 100 128
net.ipv4.ip_local_port_range = 9000 65500
net.core.rmem_default = 262144
net.core.rmem_max = 4194304
net.core.wmem_default = 262144
net.core.wmem_max = 1048576
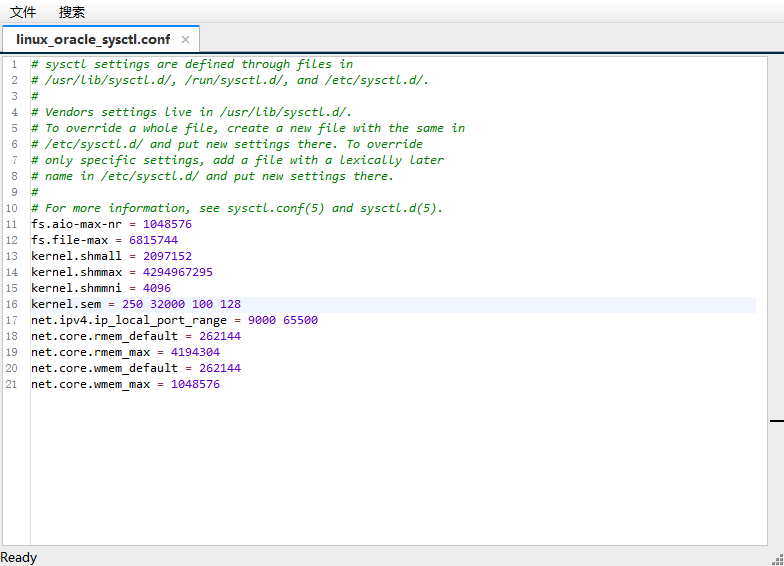
使用命令 sysctl -p 刷新生效
3.6 创建安装目录
https://docs.oracle.com/cd/E11882_01/install.112/e47689/pre_install.htm#LADBI1197
# 切换 oracle 用户
[root@localhost ~]# su - oracle
# 创建 Base 目录
[oracle@oracle11g ~]$ mkdir -p app/oracle
# 创建 Home 目录
[oracle@oracle11g ~]$ mkdir -p app/oracle/product/11.2.0
# 创建 Inventory 目录
[oracle@oracle11g ~]$ mkdir -p app/oraInventory
3.7 配置Oracle用户环境变量
编辑 /home/oracle/.bash_profile 追加以下内容
export ORACLE_HOSTNAME=oracle11g
export ORACLE_BASE=/home/oracle/app/oracle
export ORACLE_HOME=$ORACLE_BASE/product/11.2.0/
export PATH=.:$ORACLE_HOME/bin:$ORACLE_HOME/OPatch:$ORACLE_HOME/jdk/bin:$PATH
export ORACLE_SID=orcl
export LC_ALL="en_US"
export LANG="en_US"
export NLS_LANG="AMERICAN_AMERICA.ZHS16GBK"
export NLS_DATE_FORMAT="YYYY-MM-DD HH24:MI:SS"

使用命令 source /home/oracle/.bash_profile 刷新生效
4. 静默安装
4.1 解压oracle安装包
提前上传的需新建一个窗口,在root权限下将oracle安装文件移动到 /home/oracle/ 下
mv *.zip /home/oracle
确保解压出来的 database 目录文件权限组是 oracle:oinstall
[oracle@oracle11g ~]$ pwd
/home/oracle
[oracle@oracle11g ~]$ unzip "*.zip"

4.2 修改安装文件
[oracle@oracle11g ~]$ mkdir etc
[oracle@oracle11g ~]$ cp database/response/* etc/
编辑 /home/oracle/etc/db_install.rsp 安装文件
oracle.install.option=INSTALL_DB_SWONLY
ORACLE_HOSTNAME=oracle11g
UNIX_GROUP_NAME=oinstall
INVENTORY_LOCATION=/home/oracle/app/oraInventory
SELECTED_LANGUAGES=en,zh_CN
ORACLE_HOME=/home/oracle/app/oracle/product/11.2.0/
ORACLE_BASE=/home/oracle/app/oracle
oracle.install.db.InstallEdition=EE
oracle.install.db.DBA_GROUP=dba
oracle.install.db.OPER_GROUP=oinstall
oracle.install.db.config.starterdb.type=GENERAL_PURPOSE
oracle.install.db.config.starterdb.globalDBName=orcl
oracle.install.db.config.starterdb.SID=orcl
oracle.install.db.config.starterdb.memoryLimit=512
oracle.install.db.config.starterdb.password.ALL=njdys123
DECLINE_SECURITY_UPDATES=true
4.3 静默安装
对照此文档查看 静默安装Oracle11g流程之解决错误.md ,建议先配置好再执行安装命令。
安装命令
[oracle@oracle11g ~]$ cd database/
[oracle@oracle11g database]$ ./runInstaller -ignorePrereq -force -silent  -responseFile /home/oracle/etc/db_install.rsp -showProgress
出现红框内提示表示安装完成
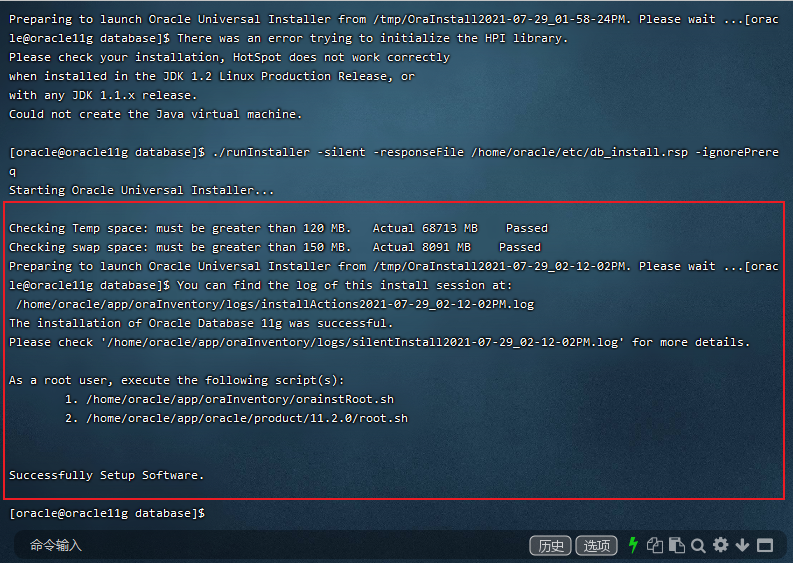
一定要看下日志有无错误
按照提示,进行以下步骤,新开一个终端,使用 root 用户运行这两个脚本
[root@oracle11g ~]#  /home/oracle/app/oraInventory/orainstRoot.sh
Changing permissions of /home/oracle/app/oraInventory.
Adding read,write permissions for group.
Removing read,write,execute permissions for world.

Changing groupname of /home/oracle/app/oraInventory to oinstall.
The execution of the script is complete.
[root@oracle11g ~]#  /home/oracle/app/oracle/product/11.2.0/root.sh
Check /home/oracle/app/oracle/product/11.2.0/install/root_oracle11g_2021-07-30_16-56-26.log for the output of root script
[root@oracle11g ~]#
4.4 配置监听程序
[oracle@oracle11g ~]$ netca /silent /responseFile /home/oracle/etc/netca.rsp

Parsing command line arguments:
    Parameter "silent" = true
    Parameter "responsefile" = /home/oracle/etc/netca.rsp
Done parsing command line arguments.
Oracle Net Services Configuration:
Profile configuration complete.
Oracle Net Listener Startup:
    Running Listener Control:
      /home/oracle/app/oracle/product/11.2.0/bin/lsnrctl start LISTENER
    Listener Control complete.
    Listener started successfully.
Listener configuration complete.
Oracle Net Services configuration successful. The exit code is 0
查看监听端口
netstat -tnpl | grep 1521
4.5 静默创建数据库
别忘了这一步,没装数据库会报错
编辑应答文件 /home/oracle/etc/dbca.rsp
GDBNAME = "orcl11g.oracle11g"
SID = "orcl"
SYSPASSWORD = "sys"
SYSTEMPASSWORD = "system"
DATAFILEDESTINATION = /home/oracle/app/oracle/oradata
RECOVERYAREADESTINATION = /home/oracle/app/oracle/fast_recovery_area
CHARACTERSET = "AL32UTF8"
NATIONALCHARACTERSET= "UTF8"
TOTALMEMORY = "1638"
创建数据库
$ dbca -silent -responseFile /home/oracle/etc/dbca.rsp
Copying database files
1% complete
3% complete
11% complete
18% complete
26% complete
37% complete
Creating and starting Oracle instance
40% complete
45% complete
50% complete
55% complete
56% complete
60% complete
62% complete
Completing Database Creation
66% complete
70% complete
73% complete
85% complete
96% complete
100% complete
Look at the log file "/home/oracle/app/oracle/cfgtoollogs/dbca/orcl11g/orcl11g.log" for further details.
删除实例命令【非必用,可选】
[oracle@oracle11g ~]$ dbca -silent -deleteDatabase -sourcedb orcl
查看监听状态
[oracle@oracle11g ~]$ lsnrctl status

LSNRCTL for Linux: Version 11.2.0.4.0 - Production on 06-AUG-2021 11:38:50

Copyright (c) 1991, 2013, Oracle.  All rights reserved.

Connecting to (DESCRIPTION=(ADDRESS=(PROTOCOL=IPC)(KEY=EXTPROC1521)))
STATUS of the LISTENER
------------------------
Alias                     LISTENER
Version                   TNSLSNR for Linux: Version 11.2.0.4.0 - Production
Start Date                06-AUG-2021 11:31:20
Uptime                    0 days 0 hr. 7 min. 29 sec
Trace Level               off
Security                  ON: Local OS Authentication
SNMP                      OFF
Listener Parameter File   /home/oracle/app/oracle/product/11.2.0/network/admin/listener.ora
Listener Log File         /home/oracle/app/oracle/diag/tnslsnr/oracle11g/listener/alert/log.xml
Listening Endpoints Summary...
  (DESCRIPTION=(ADDRESS=(PROTOCOL=ipc)(KEY=EXTPROC1521)))
  (DESCRIPTION=(ADDRESS=(PROTOCOL=tcp)(HOST=oracle11g)(PORT=1521)))
Services Summary...
Service "orcl11g.oracle11g" has 1 instance(s).
  Instance "orcl", status READY, has 1 handler(s) for this service...
Service "orclXDB.oracle11g" has 1 instance(s).
  Instance "orcl", status READY, has 1 handler(s) for this service...
The command completed successfully
4.6 登录数据库
[oracle@oracle11g ~]$ sqlplus / as sysdba

SQL*Plus: Release 11.2.0.4.0 Production on Fri Aug 6 11:46:17 2021

Copyright (c) 1982, 2013, Oracle.  All rights reserved.


Connected to:
Oracle Database 11g Enterprise Edition Release 11.2.0.4.0 - 64bit Production
With the Partitioning, OLAP, Data Mining and Real Application Testing options

# 启动数据库
SQL> startup;
ORA-01081: cannot start already-running ORACLE - shut it down first

# 关闭数据库
SQL> shutdown immediate
Database closed.
Database dismounted.
ORACLE instance shut down.

# 启动数据库
SQL> startup
ORACLE instance started.

Total System Global Area 1286066176 bytes
Fixed Size                  2252904 bytes
Variable Size             419434392 bytes
Database Buffers          855638016 bytes
Redo Buffers                8740864 bytes
Database mounted.
Database opened.
SQL>


# 查看数据库版本
SQL> select * from v$version;

BANNER
-------------------------------------------------------------------
Oracle Database 11g Enterprise Edition Release 11.2.0.4.0 - 64bit Production
PL/SQL Release 11.2.0.4.0 - Production
CORE    11.2.0.4.0      Production
TNS for Linux: Version 11.2.0.4.0 - Production
NLSRTL Version 11.2.0.4.0 - Production


# 查看数据库编码
SQL> select userenv('language') from dual;

USERENV('LANGUAGE')
---------------------------------------------------------------------
AMERICAN_AMERICA.AL32UTF8


# 解锁Scott用户
SQL> alter user scott account unlock;

User altered.

SQL> alter user scott identified by scott;

User altered.